Growing vegetables and mushrooms together may seem challenging. What if we told you that by including mushrooms in your mulch, you can effectively double your growing space? It may sound too good to be true, but it’s a tried and tested method that urban farmers have been using for years. When you grow mushrooms with vegetables, you can speed up the breakdown of materials and make nutrients available more quickly.
In this article, we’ll show you how to incorporate mushrooms into your urban garden. Take advantage of their symbiotic properties to improve plant growth. And double your growing space by adding mushrooms in between the plants you are already growing.
Table of Contents
How to Grow Mushrooms With Vegetables
- Incorporate mushrooms in your mulch
- Grow mushrooms in garden beds
- Grow mushrooms around your perennials
- Build a raised garden bed out of shiitake logs
- Grow mushrooms in straw bales
- Grow mushrooms in containers
Mushrooms are excellent for breaking down carbon-rich materials and returning them to the soil as organic matter. Organic matter is crucial for soil health, as it improves soil structure, water-holding capacity, and soil porosity.
Additionally, organic matter feeds the microbes in your soil, improving overall soil ecology. Which is one of the principles of regenerative agriculture.
If you have trouble organizing read our guide to organizing your backyard garden.
Let’s dig into each method.
Incorporate Mushrooms into Your Mulch

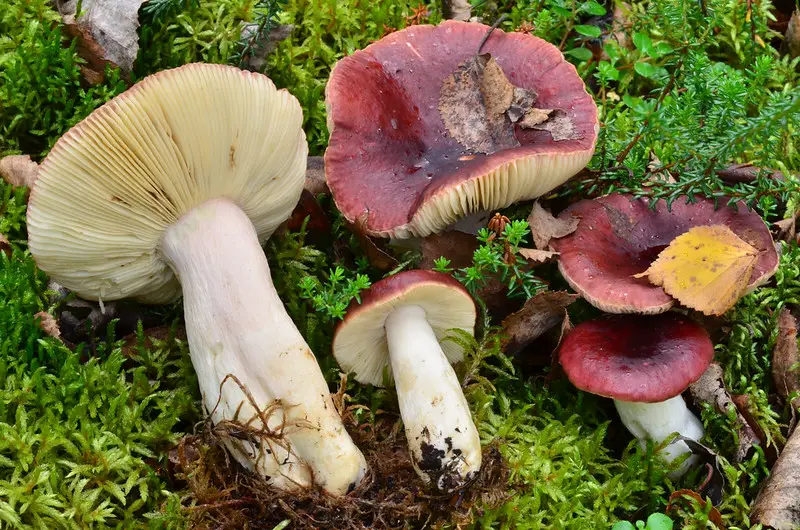
Image taken from Field & Forest site
One of the best mushrooms to use for mulching is wine cap. Wine cap spawn is adaptable and resilient, making it an excellent companion to your vegetables in the garden. It can grow to be as big as a dinner plate!
It can also tolerate drier conditions and more sun than other types of mushrooms. Wine cap is not commonly found in grocery stores because it prefers to grow outdoors and interact with other microbes in the soil.
To start growing this beauty you will need the wine cap mushroom spawn. If you would like to browse, click the button.
This article includes affiliate links, meaning we will earn a small commission if you decide to purchase any of the affiliated items.
Here are the steps for mulching:
- Before you mulch your garden put something down to keep the weeds from popping up through the mulch, you can use cardboard or old grain bags.
- Select a material that contains lignin. Lignin is a complex organic polymer found in the cell walls of many plants, making it an ideal material for mushroom growth. Straw or wood chips are two popular choices.
- Start by breaking up the spawn into smaller pieces and massaging the bag.
- Sprinkle a light layer of the spawn on the area you want to mulch, making sure to spread it out evenly.
- If there are any big chunks, break them up by hand.
- One bag of spawn will inoculate a 4×4 square or roughly 16 square feet.
- After spreading the spawn, cover it with a layer of organic mulch, like wood chips, grass clippings, or straw.
- It’s essential to make sure that the mulch covers the spawn completely.
- Keep the mulch moist by watering it regularly.
- Wine caps can be harvested anywhere from two to eleven months after planting.
- Wait for the mushrooms to grow and enjoy your harvest!
Mulch your garden beds with straw and oyster grain spawn
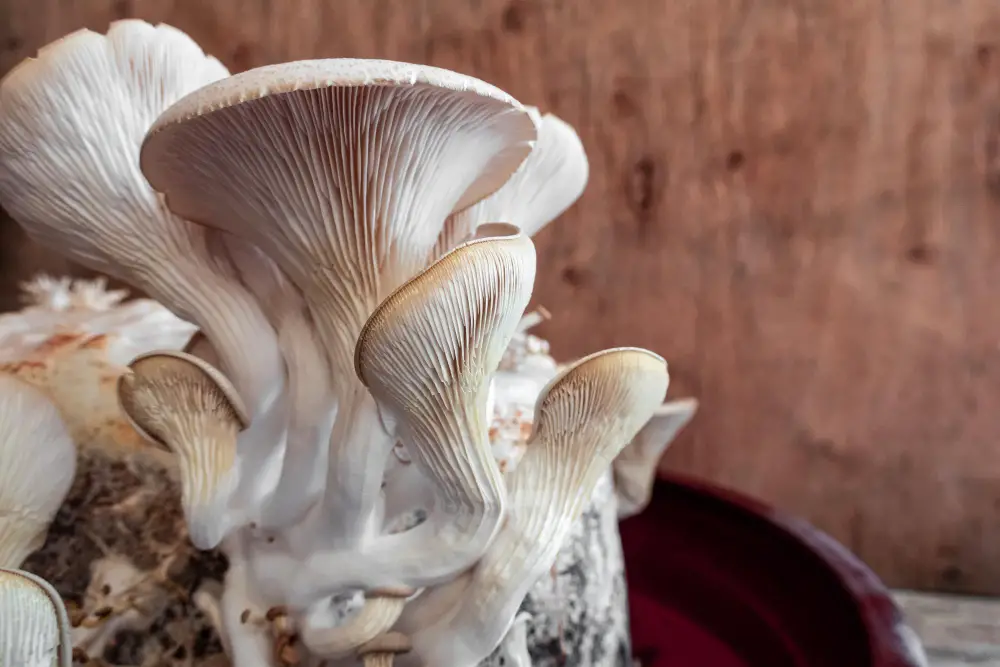
Image by wirestock on Freepik
When it comes to mulching your garden beds, you may be wondering whether to use wood chips or straw. While both have their advantages and disadvantages, we recommend using straw for several reasons.
Straw requires less nitrogen to break down compared to wood chips. Making it ideal for mulching in vegetable garden beds. Great for preventing weeds from growing in your garden beds. Hay, on the other hand, can have seeds that can sprout and become weeds in your garden so it’s not recommended to use it.
Oyster grain spawn will add extra nitrogen to your soil and give a nutrient boost to your vegetables. Let’s look at how to mulch with oyster grain spawn.
- To get started, you’ll need straw, and oyster grain spawn.
- Take a layer of straw and spread it evenly over your garden bed.
- This will help create a nutrient-rich environment for your plants and the oyster grain spawn.
- Next, add a layer of oyster grain spawn.
- You can use any type of oyster spawn.
- Add another layer of straw on top of the oyster grain spawn.
- This will help cover the spawn and create a suitable environment for it to grow.
- Water your garden bed to ensure that it’s moist enough for the oyster grain spawn to grow.
- Expect full colonization in two to four months.
Grow mushrooms around perennials
You can inoculate wood chips with wine cap sawdust spawn and spread them around your perennials. Wine cap is a versatile mushroom that can easily grow on hardwood chips as well as softwood chips.
- Lay down a layer of cardboard or something similar around your perennials.
- Sprinkle wine cap sawdust spawn around your trees or bushes.
- Cover with hardwood or softwood chips.
- Keep an eye on them over the next few months and water regularly.
- It may take until next year before getting any mushrooms.
- Once established, the wine cap mushroom will reseed itself and pop up in other mulch areas in your garden.
A great option for mulching are cedar wood chips. Check them out on Amazon.
Make Raised garden beds from shiitake logs
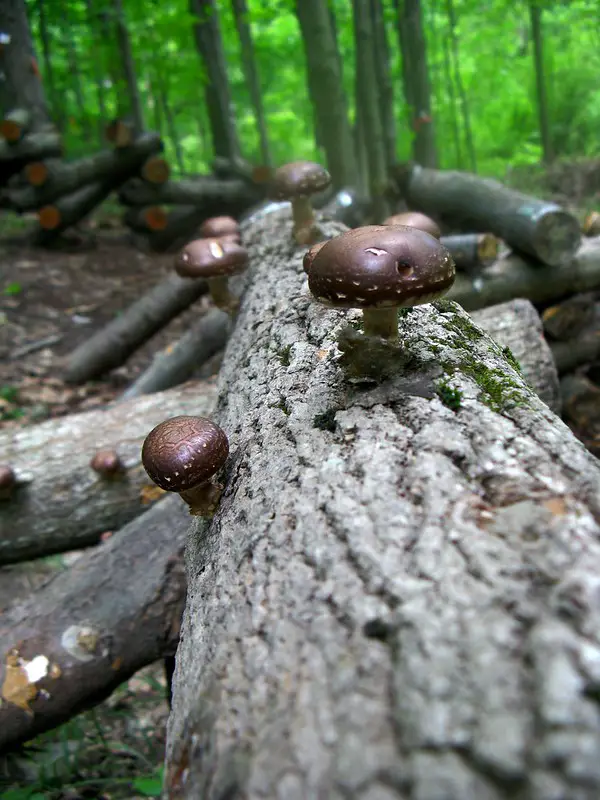
Image from Flickr
Another way is to use fully colonized shiitake logs to build a raised garden bed. This is a great way to diversify the ecology of your garden and get more life out of your older shiitake logs. However, make sure that your logs are fully colonized before using them in your garden.
There are plenty of options for shiitake spawn plugs, If yore doing it for the first time a good option to consider is a shiitake plug spawn starter kit. Click the button to get one on Amazon.
You can also use grain spawn to enrich the soil and increase plant growth. Here are the steps:
- Build a raised garden bed out of fully colonized shiitake logs to incorporate mushrooms into your garden
- Use older shiitake logs that have been fully colonized and fruited a few times
- Don’t use freshly inoculated shiitake logs in the garden as they need ideal incubation conditions
- Direct sunlight in the garden can dry out the logs and expose them to competitor fungi
- The technique is easy and successful for growing mushrooms and improving garden soil
- Break up bags of grain spawn and spread into the soil to enrich it with nitrogen, increase plant growth, and help break down woody material
- Plant veggies in the mushroom bed after adding the grain spawn.
Grow mushrooms in straw bales
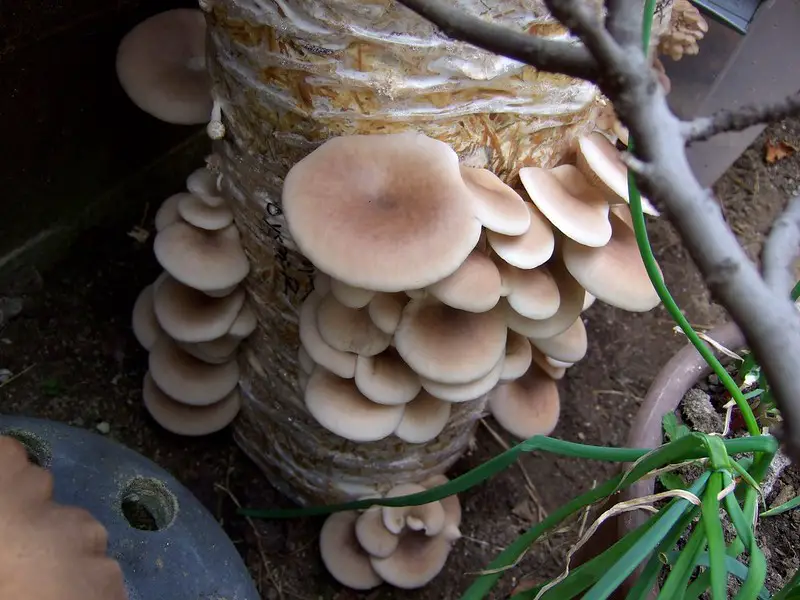
Image from Flickr
Straw bale gardening is a popular and easy way to grow vegetables without having to do a lot of weeding. It’s great for small spaces and the heat generated by decomposition helps plants grow.
The technique can be adapted to grow mushrooms by inoculating straw bales with different species of oyster mushrooms like black king, snow, italian and golden. Here’s how to do it:
- Condition the bale by adding a nitrogen source to initiate decomposition.
- It is best to use grain spawn for this.
- Grain spawn adds nitrogen and introduces mushroom mycelium to speed up the breakdown.
- Make sure to get spawn on all sides of your straw bale.
- If you’re inoculating in the summer or you live in a warmer climate, use sawdust spawn which will slow down the decomposition and create ideal mycelial growth conditions.
- Water the straw bales after inoculation, and make sure they are fully hydrated.
- Expect full colonization in two to four months.
To browse straw bales on Amazon, click the button below.
Grow mushrooms in containers
Oyster mushrooms are great for outdoor growing because they don’t need a sterile environment and are very aggressive. Oyster mushrooms can grow on different agricultural products. Straw is the most common.
Grain spawn and sawdust spawn can both be used for this technique. Containers with good airflow and drainage are necessary. Here’s what you need to do:
- When preparing straw consider the particle size.
- Pieces that are too small will compress and the substrate will go anaerobic.
- Large pieces will make the substrate dry out too fast.
- The straw should be hydrated, you can soak it for half an hour to an hour.
- After that allow some time for the straw to drain.
- Start adding layers to your container, start with the first layer of straw.
- Use oyster sawdust spawn to inoculate the straw layers in the containers.
- Finish up with a layer of straw.
- Keep the mushroom installs hydrated.
- The colonization time is two to four months.
Benefits of Growing Mushrooms in Your Urban Garden
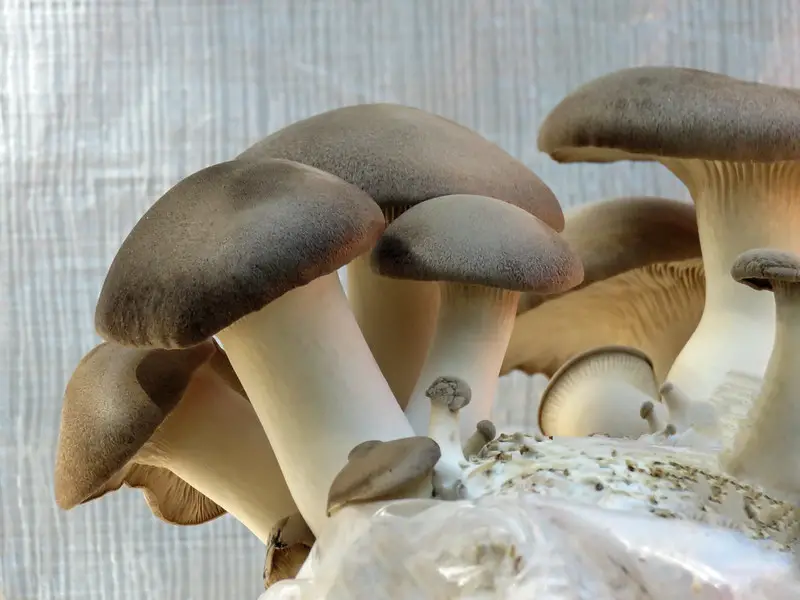
Image from Flickr
Incorporating mushrooms into your garden can be a fun and rewarding experience. Not only can they add an interesting element to your garden, but they can also provide you with a delicious and healthy addition to your meals.
There are several benefits to growing mushrooms in your urban garden. Here are a few:
- Space efficiency – Incorporating mushrooms into your mulch can effectively double your growing space, which is essential for urban gardeners who have limited space.
- Speed up the breakdown of materials – Mushrooms help speed up the breakdown of materials such as mulches and wood chips, making nutrients available more quickly.
- Symbiotic properties – Wine caps have lots of symbiotic properties with plants, which can help improve plant growth.
- Forage for bees – Mushrooms are a fantastic forage for bees, which can help increase your pollination rate if you live in an urban environment.
Optimize every nook and cranny in your garden
As an urban farmer, space efficiency is a primary focus. Incorporating mushrooms into your mulch can help you optimize every nook and cranny in your garden, including the area around your trees. By mulching around the base of your tree, you can produce extra mushrooms while also protecting the young plant’s roots during frost. Mushrooms can be great companions to your other plants, if you would like to know more, here is a guide on mushroom companion plants.
What to do after you harvest your mushrooms
If you’re growing mushrooms in containers or bales and wondering what to do after your harvest, don’t just throw out your growing materials on the compost heap.
Mushrooms are primary decomposers, meaning that they like to have fresh material in which to grow. By taking your old material like straw, and mixing it with fresh material, you can kick-start the process again and harvest another three, four, or even five flushes.
FAQs
What species of mushrooms should I use for mulching?
- Wine caps are an excellent species for mulching, as they are super hardy and have symbiotic properties with plants. However, you can also use oyster mushrooms, shiitake, and other species.
Can I grow mushrooms in buckets or beds instead of mulch?
- Yes, you can grow mushrooms in buckets or beds by following the same principles as mulching. It’s all about choosing the right species and obtaining the mycelium.
How do mushrooms improve plant growth?
- By breaking down materials such as mulches and wood chips, mushrooms release nutrients and make them available more quickly. This helps plants grow faster and healthier.
Can incorporating mushrooms in my garden help increase pollination rates?
- Yes, mushrooms are a fantastic forage for bees, and incorporating them into your garden can help increase pollination rates, especially in urban environments.
Incorporating mushrooms into your urban garden is a great way to optimize your growing space and improve plant growth. By using species such as wine caps and adding mycelium to your mulch you will improve soil quality and help your other plants grow strong and healthy.
If you already have mushrooms in your garden that you did not plan for here is what you should know.
